The Definitive Website Pre-Launch Checklist
If your palms aren’t a little sweaty, you’re probably missing something.

You’ve spent a lot of time building your new website and now it’s time to migrate it from staging to its new home. There are a staggering number of ways to screw this up. If your palms aren’t a little sweaty, you’re probably forgetting something important.
At JDM Digital, we’ve launched literally hundreds of new (and very large) websites. So we’ve learned, often the hard way, all the things that can go wrong with a go-live.
Here’s our definitive website launch checklist. We won’t go into too much detail on each stage here, but eventually we’ll link to a post for each stage that digs a little deeper and provides guidance.
Prepare the Redirects
If the permalink structure has changed or if any of the existing URLs have changed, you’ll need to make sure to setup 301 redirects from the old URLs to the new ones.
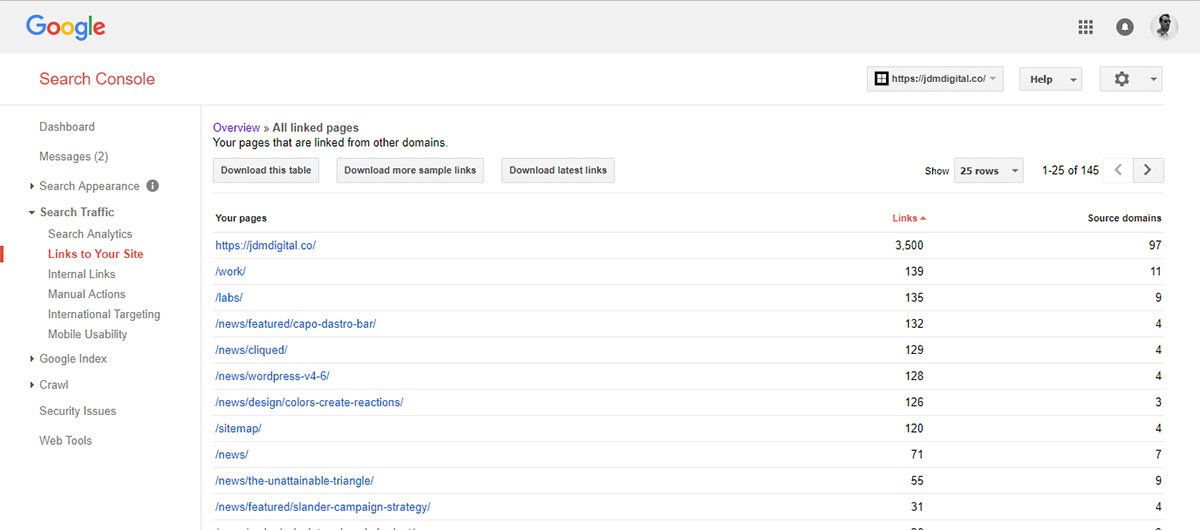
It’s also a good idea to double-check your “most linked pages” indexed by search engines are paid special attention. You can download a list of these from Google Search Console.

You can setup these 301 redirects in your .htaccess file, or process them server-side using a killer plugin like Redirection.
Optimization
A fast website makes happy website visitors. You’ve been in a staging environment, making lots of changes and revisions along the way, but that time is ending. It’s time to really optimize the site to load as quickly as possible.
To that end, consider:
- Installing SmushIt and bulk smush all images uploaded to your media library
- Minify all CSS and JS (or use a plugin to do it for you)
- Use a CDN for these static resources (like logos, style, javascript, etc.)
- Remove querystrings from enqueued resources (they’re cache-busters)
Presumably, you’ve already tested the heck out of this stuff, right? You didn’t! Stop here and do that first.
Here are a few free online tests to point you in the right direction:
- Pingdom: tools.pingdom.com
- Google Pagespeed Insights: developers.google.com/speed/pagespeed/insights/
- GTmetrix: gtmetrix.com
You might also want to check out this support post titled “Boost Website Performance with HTACCESS” for handy and detailed performance optimization instructions.
Housekeeping
There are almost certainly all sorts of things left scattered on the floor after all those design revisions. Time to do some housekeeping so everything is nice and tidy prior to launch.
For example, did you upload any stock photos you didn’t purchase to show the client alternatives? You’d better delete those. You’re in violation of the license agreement if you didn’t buy them.
How about that function you wrote and never got to work right? Delete it.
Did you install a few plugins that you ended up deactivating and not deleting? Delete any plugin or theme you’re not using.
Do a search for placeholder content like “Hello World” and “Lorum Ipsum” and make sure all are removed or at least not published.
Check all the legal pages are in place. Often, nobody noticed they never wrote anything for Terms or the Privacy statement. Tisk, tisk.
Validate your code using a tool like the W3 Validator to make sure it’s up to snuff and accessible.
Access Credentials
Hopefully you got this information long ago, but double-check it’s all still current. You’ll want FTP access, phpMyAdmin access, database credentials, and more. Better yet, just ask for cPanel (or whatever Web Admin) access so you can set all this up yourself and have full access should anything go sideways.
The client can always change the cPanel login password later.
Go-Live
You can always migrate a website the old fashioned way, but we prefer to use automation tools to make the process streamlined and programmatic. Here are some of our favorite WordPress migration plugins.
Post-Launch Checklist
Once everything seems to be up and running, you’re still FAR from finished. Resist the urge to send that “It’s Live” email to everyone on the team. It’s there, but you’ve still got to iron-out the wrinkles.
- Verify Google Analytics is collecting data using the real-time dashboard
- Configure Google Search Console and connect it with Google Analytics
- Put an annotation in Google Analytics for the day the new site was launched
- Submit the new sitemap in the Search Console
- Also in Search Console, under Search Appearance >> Sitelinks, demote any URLs you no longer want appearing in search results
- Make sure the
robots.txtfile is NOT set tonoindex, nofollowordisallow: / - Click around and make sure all URLs updated correctly and nothing got missed
- Routinely check Redirection >> 404s to make sure you’re redirecting any legitimate changes to their new locations
Show off!
You did it! The new site is live and functioning properly. Now you gotta make the announcements. After all, part of the point of a website is marketing and it needs to be marketed.
- Post an article about the new website launch
- Include that post in your newsletter or send a special announcement email
- Announce it via social media. One to three shares per network over the space of a week is ideal.
Get the Email
Join 1000+ other subscribers. Only 1 digest email per month. We'll never share your address. Unsubscribe anytime. It won't hurt our feelings (much).
Discussion
Comments are now closed.